I was checking out YouTube videos looking for paper flower tutorials when I came across a video that caught my attention (here it is). "Faux Porcelain Flowers" by Sherry Cheever, I was intrigued... I watched that video a few times, and kept thinking, how cool would the flowers from the Mother's Day Bouquet Cricut cartridge look done in the same way. I had seen jars of UTEE (Ultra Thick Embossing Enamel) in craft stores and a local scrap shop or two, but never really knew what to use it for. I have embossing powders and don't really use them very often, so I figured this was just a more expensive embossing product that I wouldn't use - oh was I wrong!
I printed off my AC Moore coupon and off to the store I went to pick up some UTEE and a Melting Pot. ACM had the UTEE (which I bought), but didn't have the Melting Pot, so I cruised on down to Michael's and found it there.
Enough story telling, here's my first UTEE project:
Aren't those flowers fun? Here's how I made them:
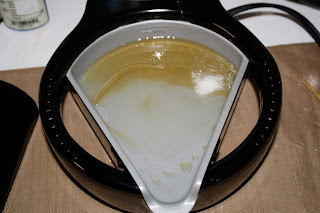
Pour some UTEE into the Melting Pot
And watch it melt... You should cover the pot with the lid provided, it will speed up the melting process.
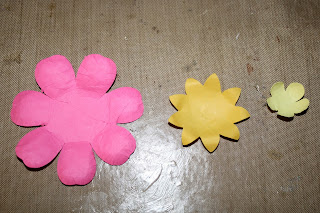
While the UTEE melts, give your paper pieces dimension by using an embossing stylus to either make lines in leaves, or as I did in the layers pictured below, go along the back side of the paper in a circular motion along the edges of each petal. This will make the petals curl. I also rolled the yellow layer's pointed edges over a bamboo skewer to make them curl.
Once you have the petals formed and your UTEE has melted, drop them into the pot and swirl them around to make sure you have coverage on all sides.
Be sure to flip your pieces over :)
Take the UTEE covered pieces out and let them cool on your non-stick heat-resistant craft mat (a "must have" for this technique!) Note: the UTEE doesn't dry clear, so expect some yellowing of your pieces. I used very bright colors and the finished project doesn't look too bright.
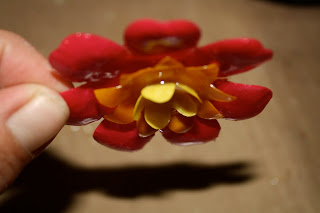
After the pieces have cooled, stack them together in a way that looks good to you. When you have them in the right place, hold them together with a skewer and using your heat gun, re-heat the stack.
As you can see in the picture below, the layers will melt together and become attached.
Even upside down it stays together :)
Now, I have to say that for one of the flowers, I had to use a hot glue gun to keep the center attached. It worked great!
The picture below was the first flower I made - my very first UTEE project. I love how it came out. The cartridge I used was the Mother's Day Bouquet.
Here's a close-up of the flower grouping.
I used Tim Holtz corked vials filled with sand and teenie-tiny shells we found that day on the beach.
The base of the wall hanging was cut from the Lacy Labels Cricut Lite cartridge
Papers I used were "Backyard Splash" by American Crafts (waves) and "Caribbean" by Reminisce (the "Paradise" collection). The dotted paper for the photo mat was from an older DCWV Summer Stack.
I have to admit, the layout was scraplifted from Sherry as well (she's awfully talented!)
Thanks for stopping by and...
Happy crafting!
Barb


